

Fiat in WDK: Building On-Ramp and Off-Ramp Flows

By the end of this post, you'll understand WDK fiat funding and cash-out flows: discover availability, review quotes, open checkout, and track the resulting order.
What we’ve built so far
In More Than Transfers: Swaps, Bridges, Lending, and Fiat in WDK, you separated wallet accounts from protocol modules. In Swap and Bridge in WDK: One Interface, Five Routers, you discovered routes and tracked settlement.
But before you can swap, bridge, or supply tokens, your account needs funds like USD₮. And when your user is done, they may want to turn their crypto back into money in their bank account. In this post, you will cover both steps: buying crypto with fiat to fund the wallet and selling crypto for a fiat payout.
Step 1: Understand how on-ramp and off-ramp flows work
An on-ramp lets your user pay with fiat and receive crypto. An off-ramp lets them sell crypto and receive fiat through an available payout method.
Your application coordinates three parts:
- Your wallet supplies a receiving address and, when needed, signs an outgoing transaction.
- Your application presents choices, requests quotes, opens checkout, and tracks orders.
- Your provider handles its checkout, verification, payment processing, and delivery or payout.
Unlike a DeFi contract call, a fiat flow moves money through cards and bank accounts. That brings regulatory requirements: your user may need to verify their identity, and their country, payment method, amount, and selected asset can limit what's available.
For example, Transak describes verification levels that depend on country, regulations, and transaction limits. Transak verification.
A self-custodial wallet does not remove the provider’s eligibility requirements. Keep that visible before your user starts checkout.
User: “I entered my card details. Is the USD₮ in my wallet?”
Wallet: “Your purchase is still processing. We’ll show completion when the provider confirms delivery.”
Payment submission, blockchain delivery, and fiat payout are separate milestones, and only one of them happens on-chain. Each can succeed, stall, or fail on its own, so your interface should show them as separate states instead of a single "done."
Step 2: Understand the WDK fiat module
We will use Transak as an example, but like every WDK fiat module, the API is consistent by type and exposes discovery, quote, checkout, and transaction-detail methods through the shared fiat interface. And its backend requirements and configuration are provider-specific.
Check availability with the provider before showing an option to your user. Support for a country does not mean every asset, payment method, or payout option is available there. The provider must also confirm that your user is eligible.
For this walkthrough, we will follow the Transak implementation, with the following integration details:
Integration detail | Transak |
Release used here | 1.0.2 |
Test environment value | 'STAGING' |
Checkout preparation | Create a widget session through your backend |
Module callbacks | widgetUrl for checkout, getOrder for order lookup |
Order lookup | Order ID through getOrder |
Asset selection | Asset symbol (USDT, ETH) and explicit network (ethereum) |
Sale refunds | Returned to the source wallet; no refundAddress parameter |
Also, will use Transak’s staging environment, as shown in the previous table, and select USD₮ on Ethereum from the provider’s current catalog. Later, you will see how the same flow handles native ETH. Transak staging may send test tokens instead of the ERC-20 asset you selected.
( Note: These flows help you test the integration, but they do not confirm that the same USD₮ purchase is available in production. You can also check the Transak testing behavior.)
Step 3: Get your credentials and prepare your backend
Like the other WDK modules, pick the provider module you want and provide a few configuration values. For Transak, that means two credentials: your public API key and your API secret.
⚠️ Important: Give the module only your public API key. Keep your API secret and partner access tokens on your backend, where users can't see them.
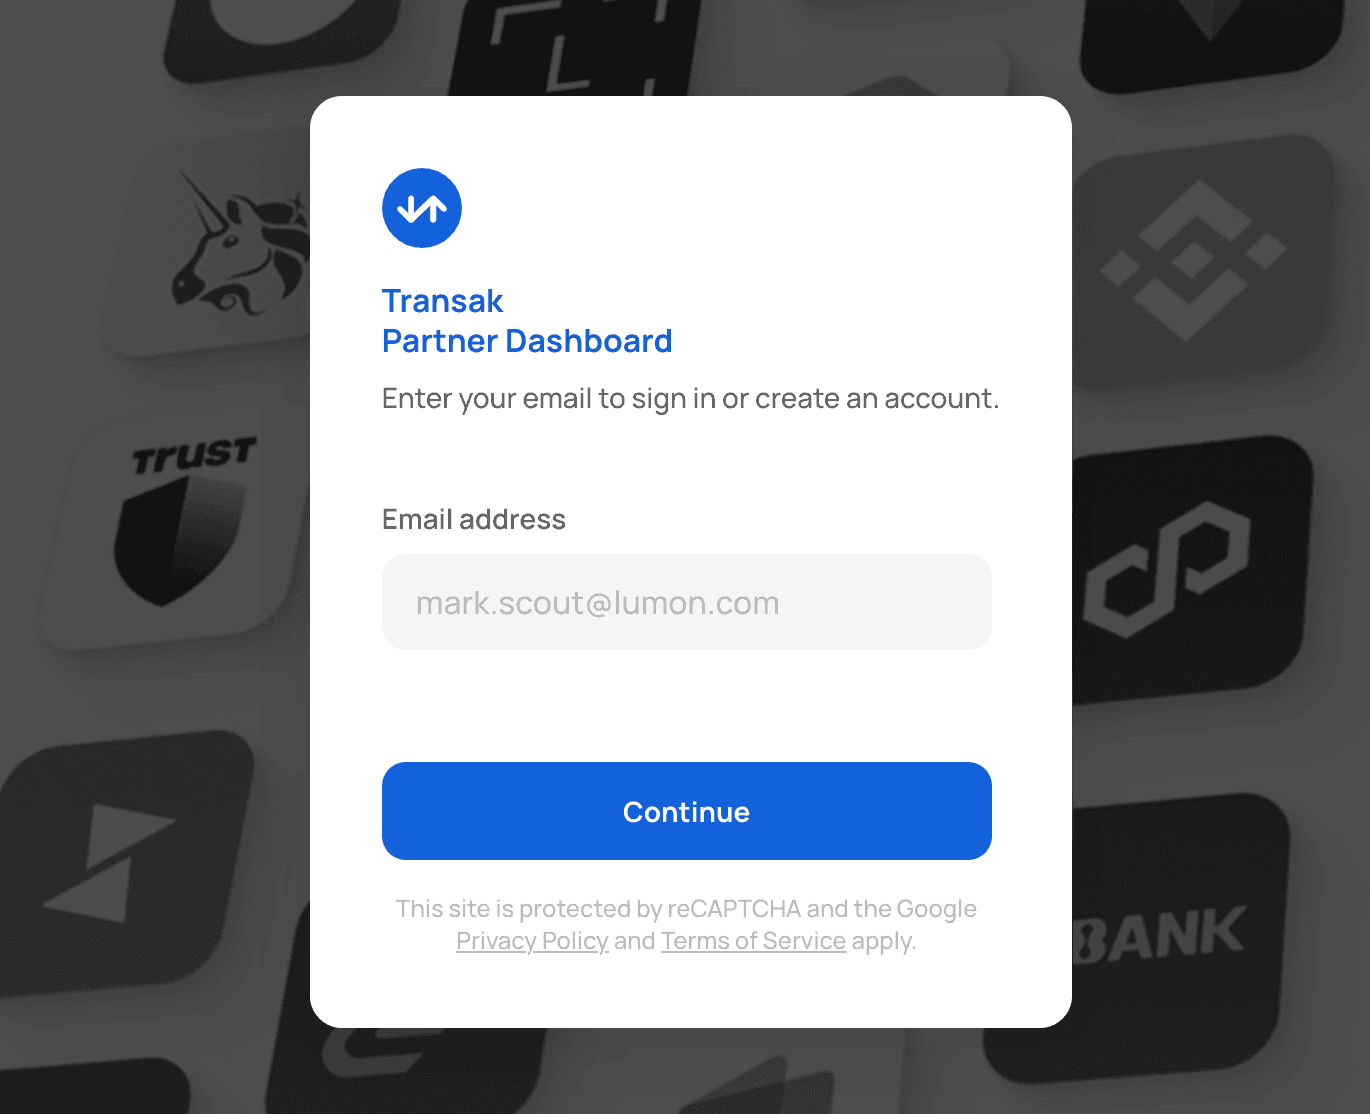
Next, go to the Transak Dashboard website and create a partner dashboard account.
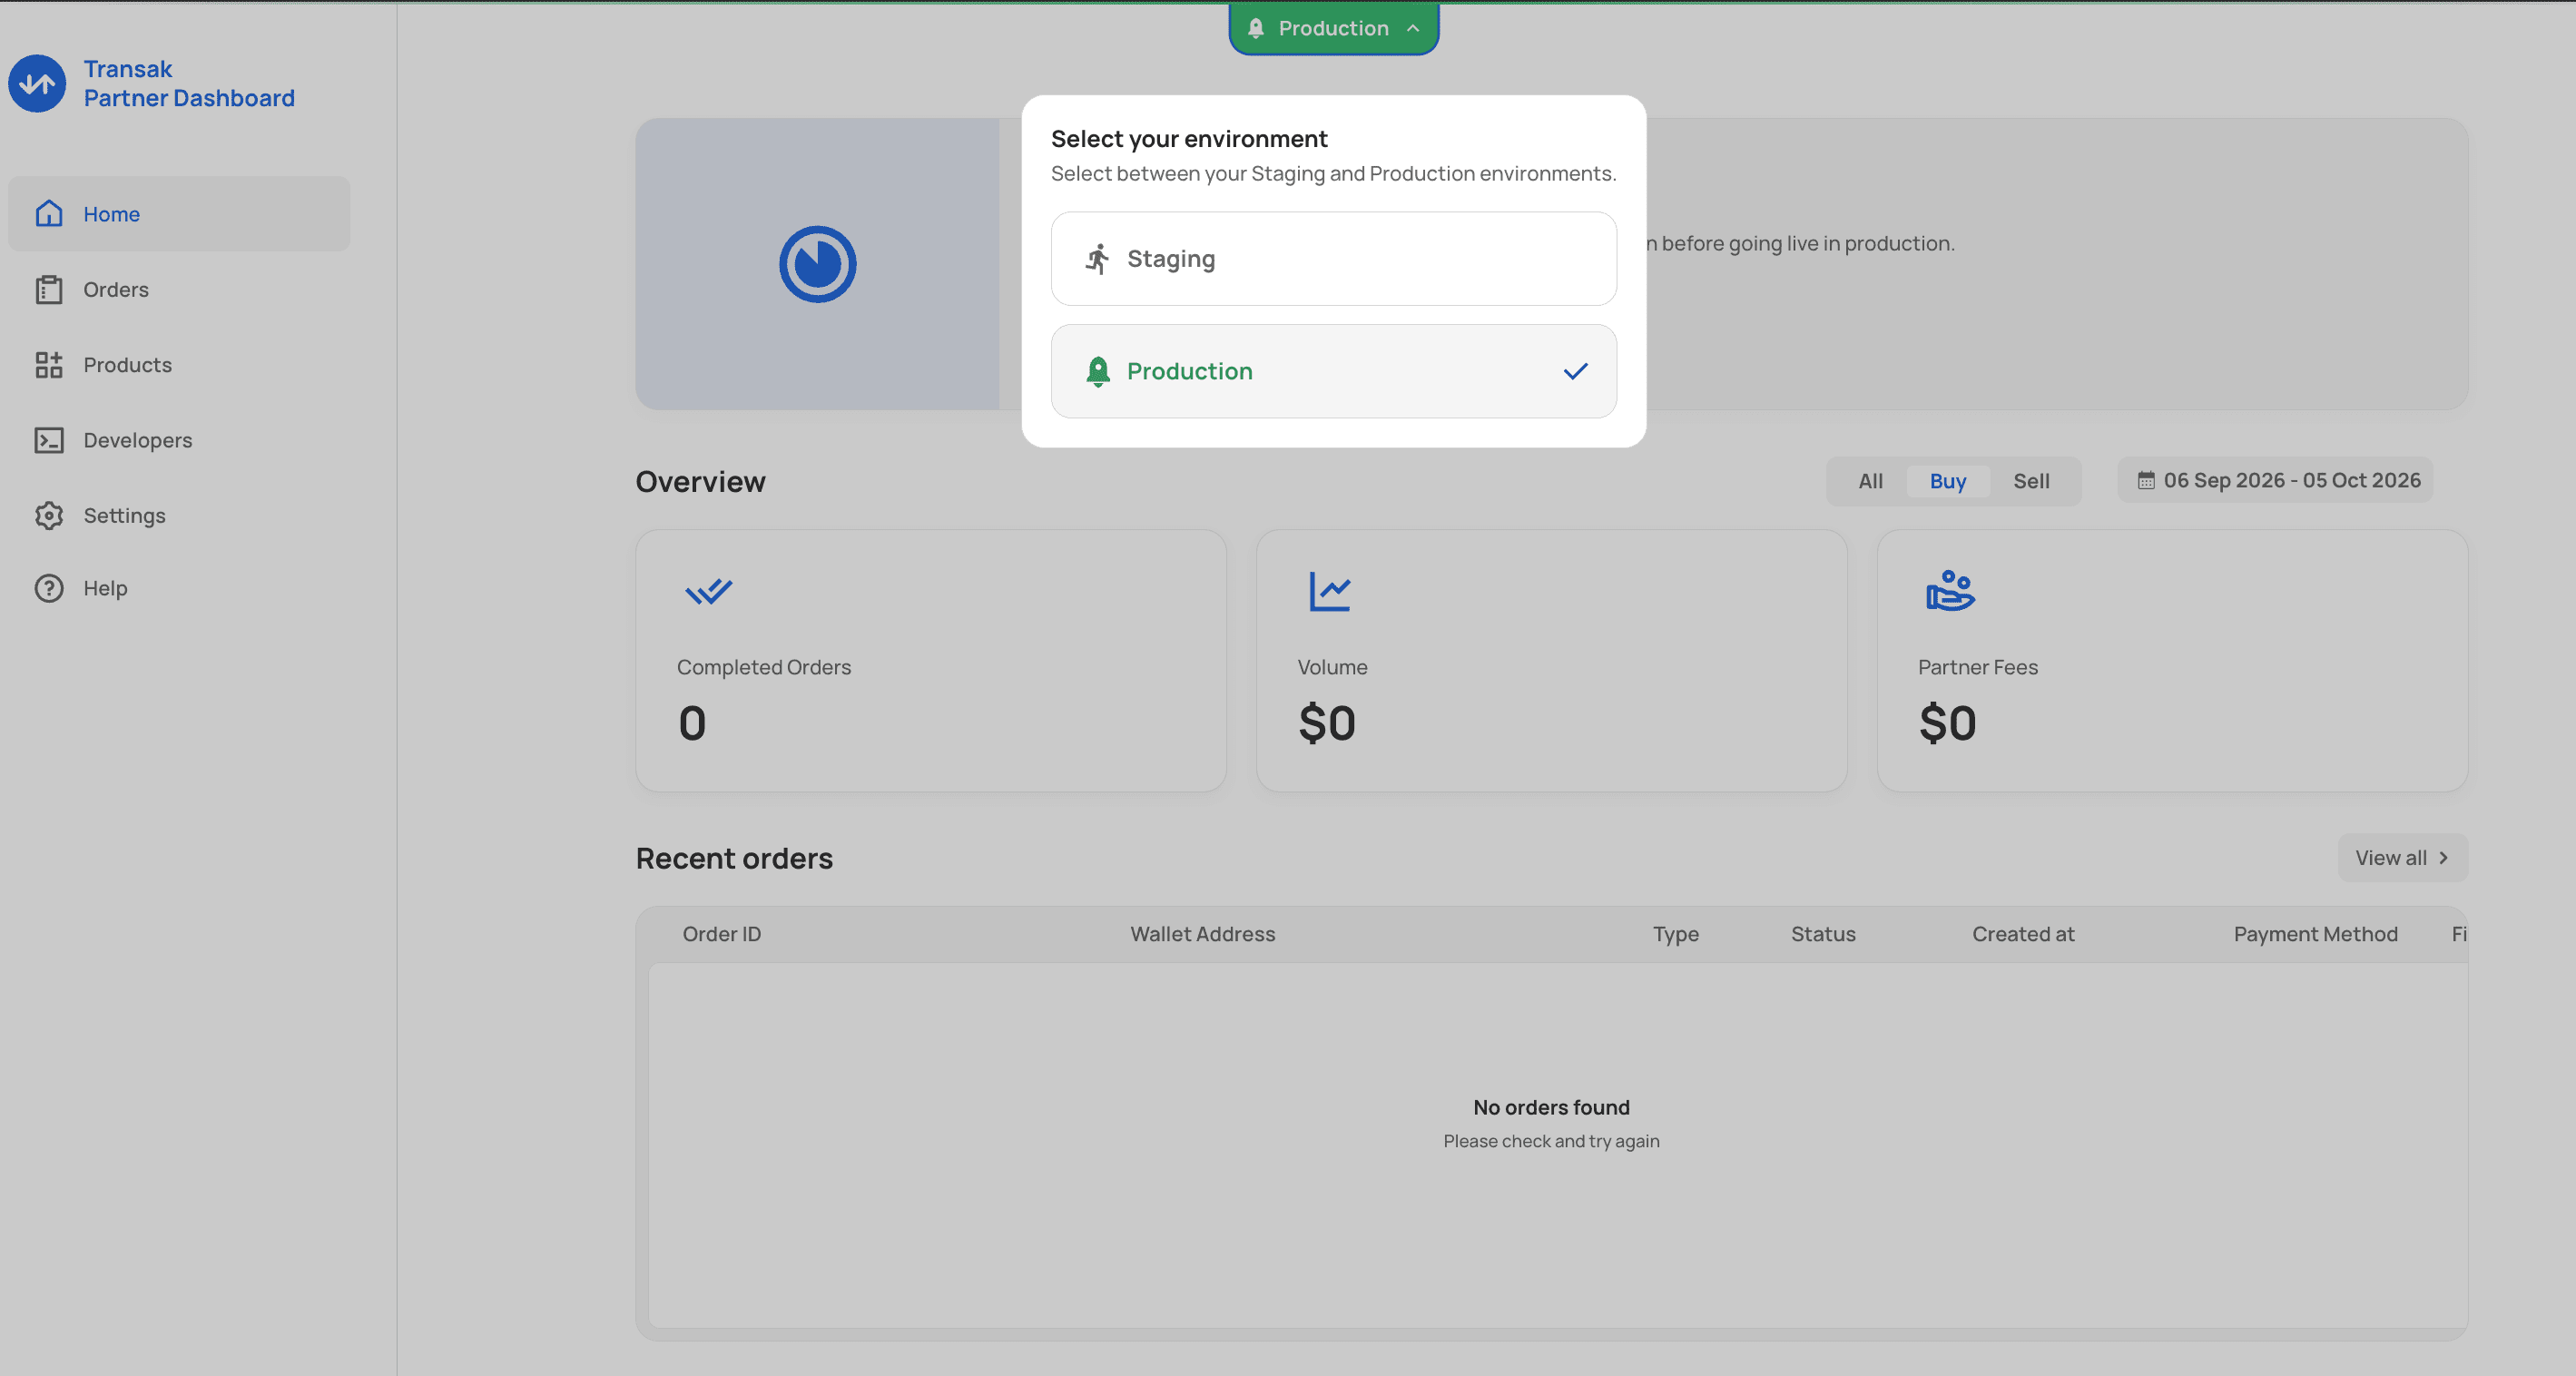
Select Staging, and then open Developers to find the API key and secret.
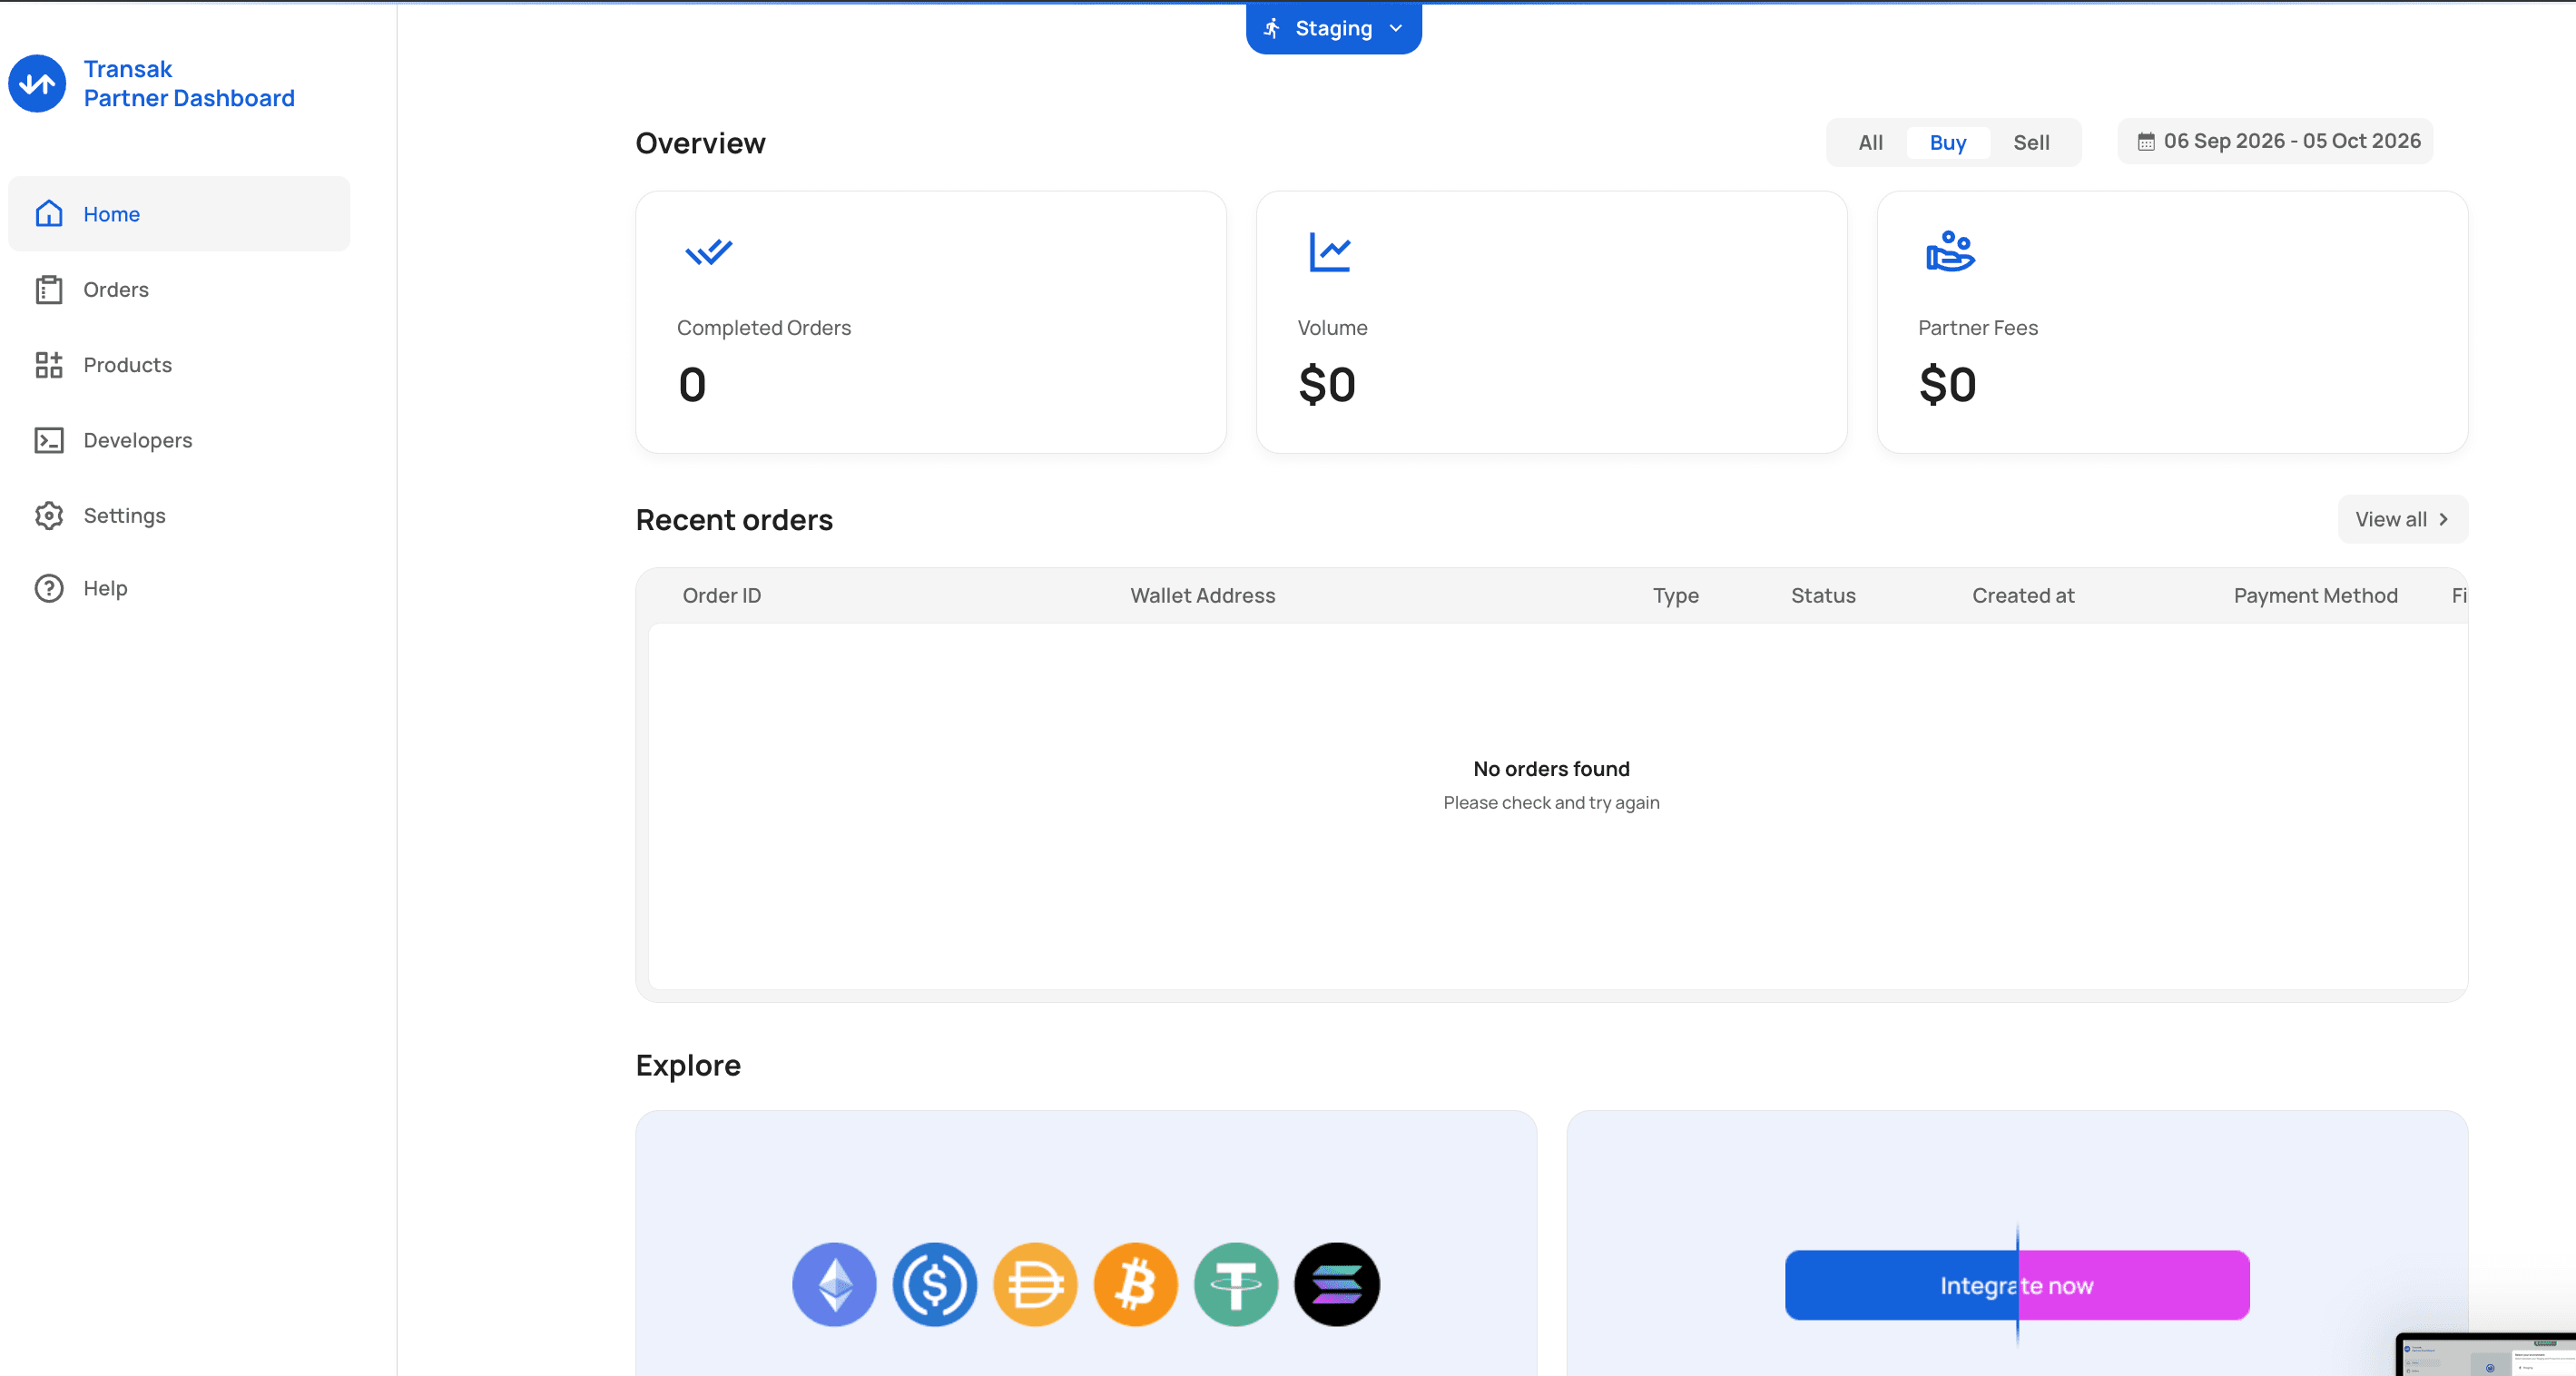
For this walkthrough, we are using staging, but production access requires business onboarding. Check the Dashboard instructions to see if your company meets the requirements.
Next, your Transak backend needs three operations:
- Exchange partner credentials for an access token.
- Create a widget session from the module’s assembled parameters.
- Retrieve an order by ID and return the unwrapped order object.
For more details, see the module's release in the README, which includes these requests. Cache access tokens until expiry, and pass the user's actual IP from the trusted request context when creating a session. A widget URL is single-use and expires after five minutes.
Now we'll register and configure our WDK wallet and the Transak protocol module.
Step 4: Register the module and discover availability
As with the previous modules, you start by installing and importing three packages:
- WDK core, which connects your wallets and protocols.
- A wallet module for the chain your provider supports. Here, that's the ERC-4337 wallet for Ethereum.
- The provider module you want to use, in this case, Transak.
For this example, you will use the ERC-4337 wallet module and Transak:
npm install @tetherto/wdk @tetherto/wdk-wallet @tetherto/wdk-wallet-evm-erc-4337 @transak/wdk-protocol-fiat-transakWhat's happening:
@tetherto/wdkprovides the core orchestrator for registering modules and accessing accounts.@tetherto/wdk-walletsupplies the protocol base classes used in registration.@tetherto/wdk-wallet-evm-erc-4337provides your ERC-4337 smart account on Ethereum.@transak/wdk-protocol-fiat-transakprovides the Transak implementation of the fiat protocol.
Then, check that everything installed correctly; your package.json should now include them as dependencies. Add "type": "module" if it isn't there yet, so the imports in the next step work:
{
  "type": "module",
  "dependencies": {
    "@tetherto/wdk": "^1.0.0-beta.18",
    "@tetherto/wdk-wallet": "^1.0.0-beta.21",
    "@tetherto/wdk-wallet-evm-erc-4337": "^1.0.0-beta.21",
    "@transak/wdk-protocol-fiat-transak": "^1.0.2"
  }
}
Import and register your wallet
Your application supplies seedPhrase through its secret lifecycle and rpcUrl for the intended EVM network.
import WDK from '@tetherto/wdk'
import WalletManagerEvmErc4337 from '@tetherto/wdk-wallet-evm-erc-4337'
import TransakProtocol from '@transak/wdk-protocol-fiat-transak'


const wdk = new WDK(seedPhrase)
  .registerWallet('ethereum', WalletManagerEvmErc4337, {
       chainId,
       provider: rpcUrl,
       safeModulesVersion: '0.3.0',
       bundlerUrl,
       paymasterUrl,
       isSponsored: true,
       sponsorshipPolicyId
  })
What's happening:
seedPhrasedetermines your signing account. Use your application’s existing secret lifecycle.- '
ethereum'identifies the wallet used by the fiat registration. chainIdselects your intended network. It must match the RPC, bundler, paymaster, and selected checkout asset.providersupplies that network’s RPC endpoint.safeModulesVersionselects the Safe module version; it must match your account infrastructure.bundlerUrlsupplies the service that submits UserOperations.paymasterUrlsupplies the service that evaluates sponsorship.isSponsoredrequests sponsored execution. It does not guarantee acceptance.sponsorshipPolicyIdidentifies your configured sponsorship policy. A missing or incompatible policy can cause rejection.
Your fiat module uses this account’s receiving address. Gas sponsorship becomes relevant when your wallet sends an on-chain transaction, such as an off-ramp deposit of USD₮. Provider checkout fees remain separate.
Add the fiat protocol module
Your wallet supplies the receiving address. Preparing checkout also requires operations that use your provider credentials, which you get from the Transak Partner Dashboard: Transak needs a widget session for checkout and a partner access token for order lookup.
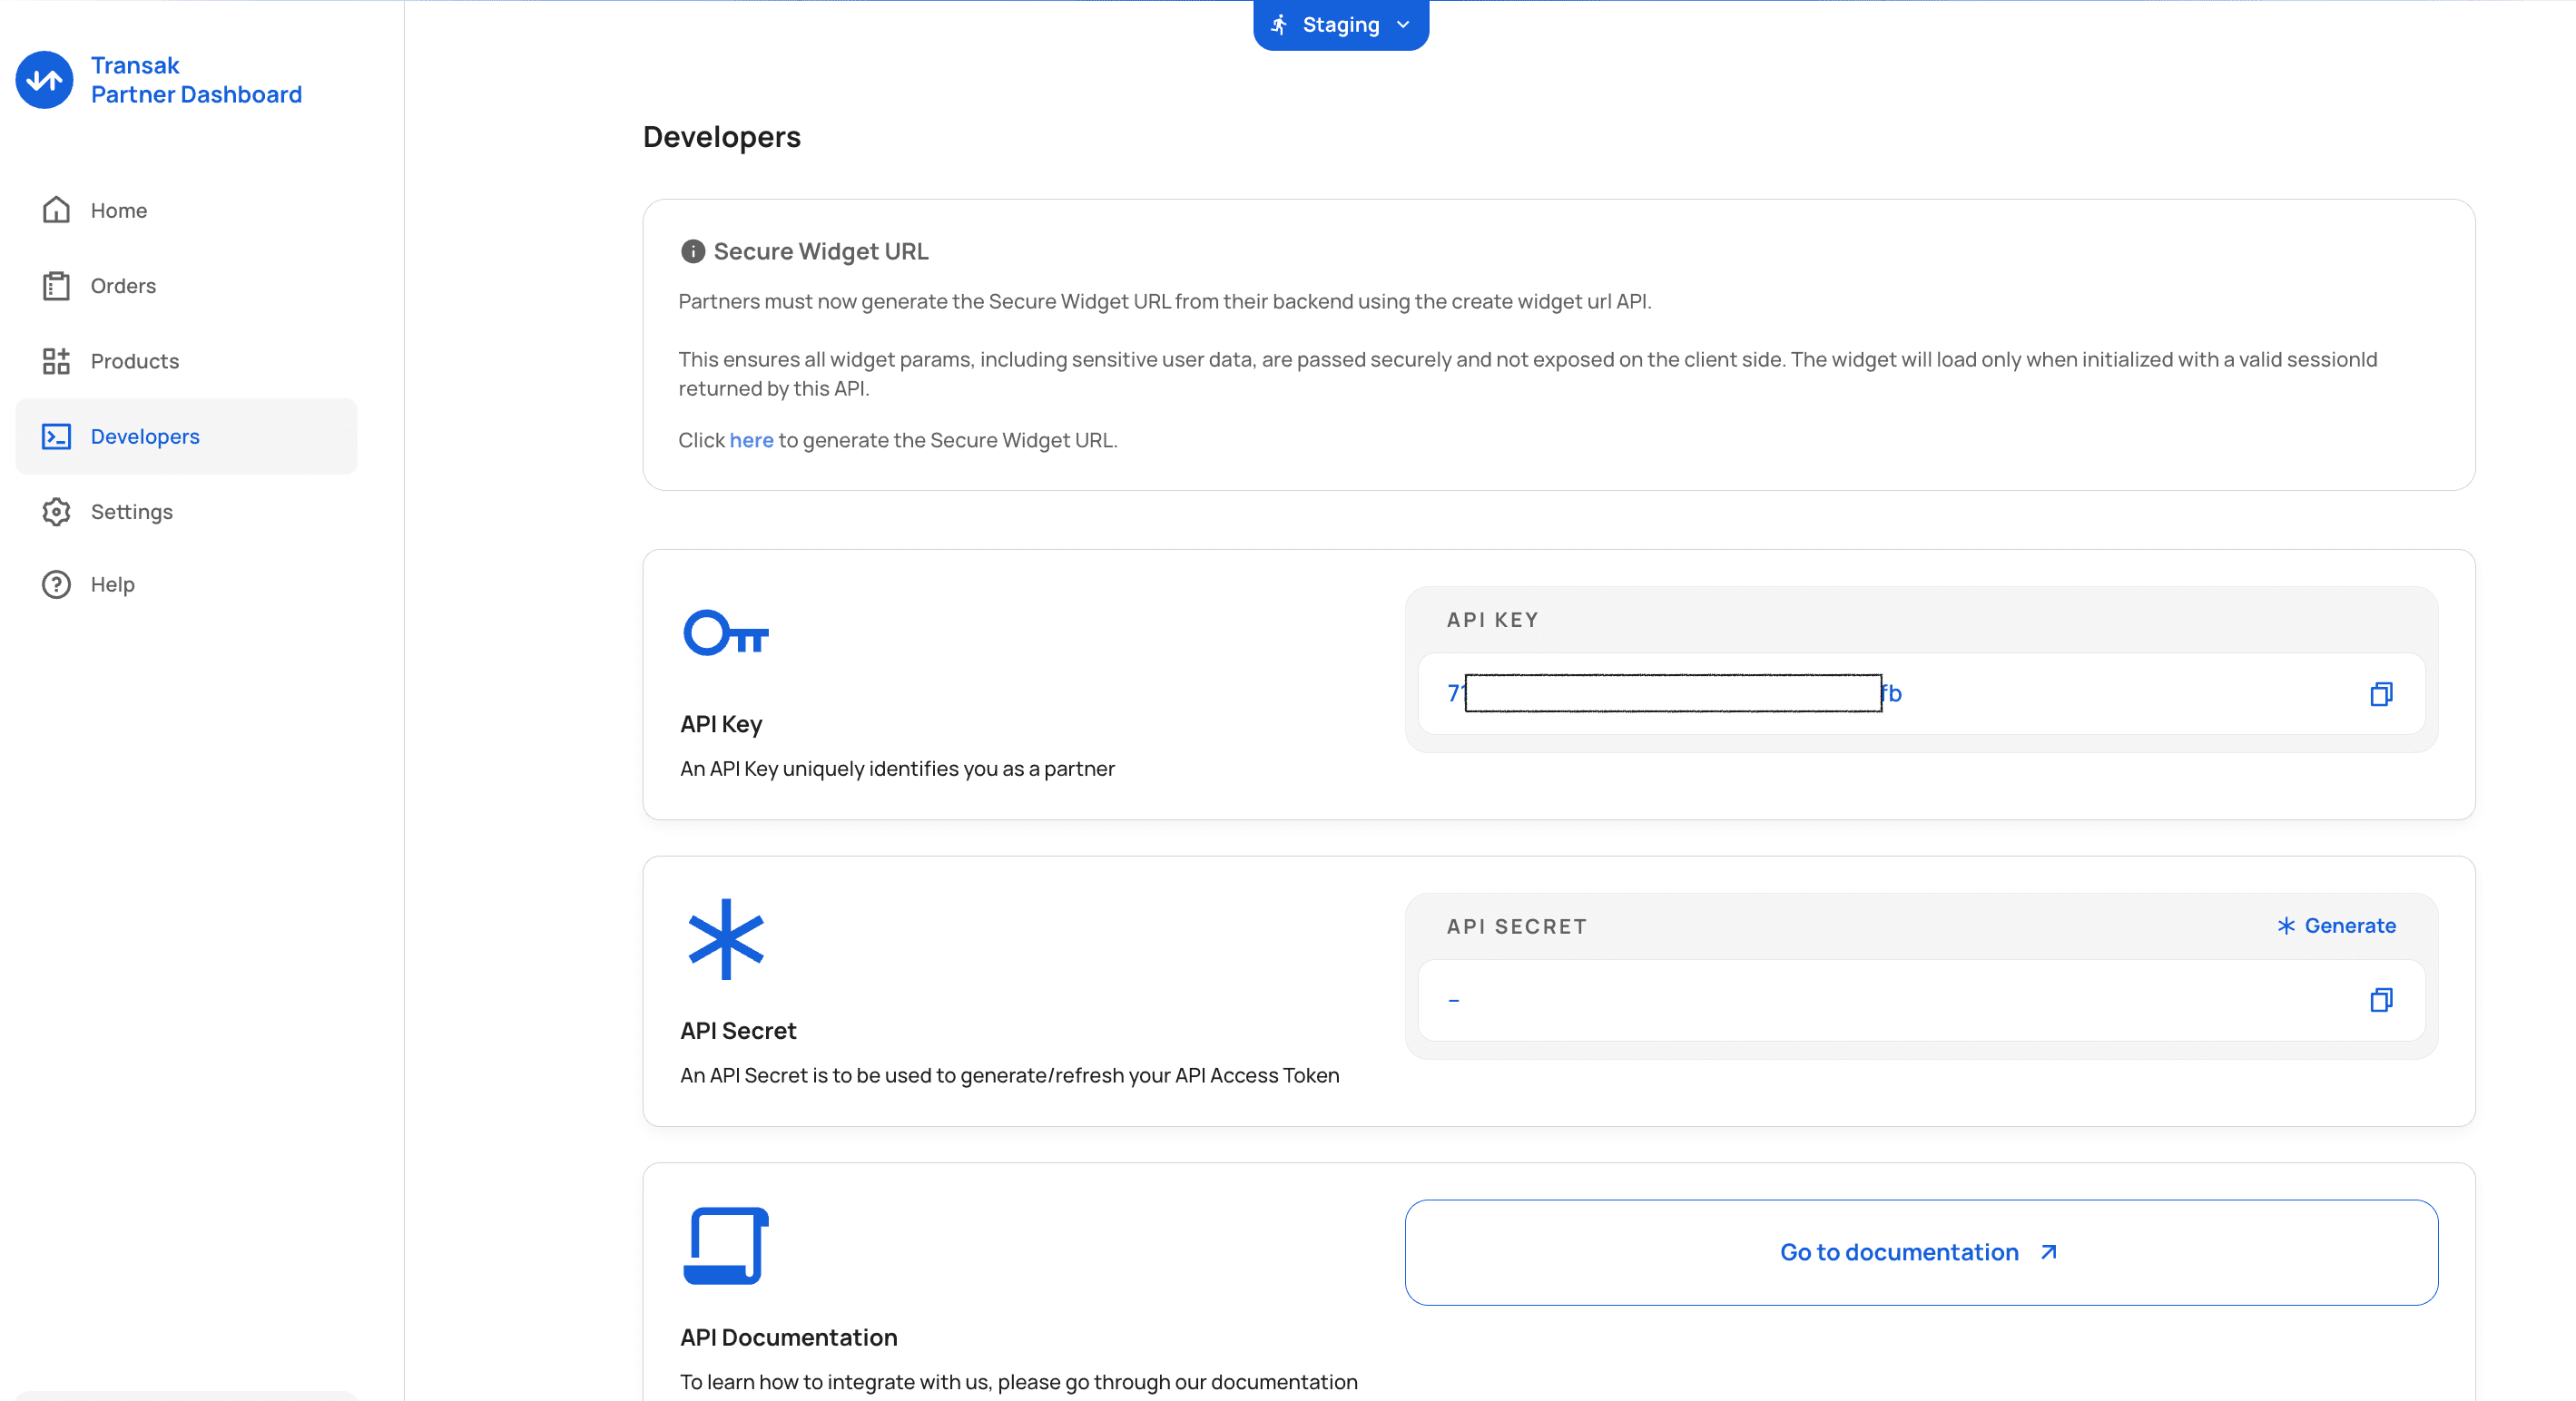
You connect those operations through callbacks in the module configuration. Because they use your API secret, the Transak module runs on your backend.
Configure Transak on your backend
Add two more values to your backend's .env file:
TRANSAK_API_SECRET=your-transak-staging-api-secret
TRANSAK_ENVIRONMENT=STAGING
Then read your Transak settings and choose the environment:
import TransakProtocol from '@transak/wdk-protocol-fiat-transak'


function requiredEnvironmentVariable(name) {
  const value = process.env[name]
  if (!value) throw new Error(`${name} is required`)
  return value
}


const partnerApiKey = requiredEnvironmentVariable('TRANSAK_API_KEY')
const partnerApiSecret = requiredEnvironmentVariable('TRANSAK_API_SECRET')
const environment = process.env.TRANSAK_ENVIRONMENT === 'PRODUCTION'
  ? 'PRODUCTION'
  : 'STAGING'


const transakApiOrigin = environment === 'STAGING'
  ? 'https://api-stg.transak.com'
  : 'https://api.transak.com'
const transakGatewayOrigin = environment === 'STAGING'
  ? 'https://api-gateway-stg.transak.com'
  : 'https://api-gateway.transak.com'
What's happening:
requiredEnvironmentVariable()stops your server at startup if a value is missing, instead of failing later during checkout.partnerApiKeyand partnerApiSecret come from your Transak Partner Dashboard. The secret never leaves your backend.- environment uses staging unless you explicitly set PRODUCTION.
transakApiOriginandtransakGatewayOriginselect the matching Transak hosts for that environment.
Your backend must also authenticate your user and validate the requested parameters before creating a checkout session or returning an order.
Now register Transak on your wallet. Its two server-side callbacks handle the authenticated operations:
wdk.registerProtocol('ethereum', 'transak', TransakProtocol, {
       apiKey: partnerApiKey,
       environment,
       widgetUrl: (widgetParams) => createWidgetUrl(widgetParams, userIp),
       getOrder
  })
What's happening:
'ethereum'attaches the provider to the wallet you registered.'transak'is your protocol label. Use the same label when retrieving it.apiKeyidentifies your integration with the key you read from your .env file. Your API secret stays on your backend.environmentuses the value you set above. Without it, the module defaults to 'PRODUCTION'.widgetUrlreceives the checkout parameters the module assembles and returns a new session URL.createWidgetUrl()creates that session with Transak, using your user's IP from the trusted request context.getOrderfetches a Transak order by ID and returns the order object itself.
You can find the implementations of createWidgetUrl() and getOrder() in the Transak configuration guide.
Retrieve the account and discover availability
Once the provider is registered, retrieve your account and the Transak instance:
const account = await wdk.getAccount('ethereum', 0)
const transak = account.getFiatProtocol('transak')
What's happening:
'ethereum'selects your registered wallet.0selects its first derived account.'transak'retrieves the provider registered under that label. A mismatched label prevents retrieval.
Next, fetch the catalogs and use them to populate your selectors. This example selects USD₮ on Ethereum and pays in USD. Your application supplies the selected country code:
const [assets, currencies, countries] = await Promise.all([
    transak.getSupportedCryptoAssets(),
    transak.getSupportedFiatCurrencies(),
    transak.getSupportedCountries()
])


const asset = assets.find(item =>
    item.code === 'USDT' &&
    item.networkCode === 'ethereum'
)
const fiat = currencies.find(item => item.code === 'USD')
const country = countries.find(item =>
    item.code === selectedCountryCode
)


if (!asset?.metadata.isAllowed || fiat?.decimals !== 2 ||
    !fiat.metadata.isAllowed || !country?.isBuyAllowed) {
     throw new Error('Selected purchase is unavailable')
}
What's happening:
'USDT'selects USD₮ by Transak’s exact symbol. Codes are matched case-sensitively, so preserve them as the catalog returns them.'ethereum'checks the asset’s network. USD₮ appears on multiple networks, so the symbol alone does not identify the asset.'USD'selects Transak’s USD entry.selectedCountryCodeselects a discovered country by its two-letter code. This does not establish your user’s KYC eligibility.metadata.isAllowedon the asset and the currency checks that buying is enabled for each.decimalschecks the two-decimal assumption used for USD amounts in the next step.isBuyAllowedchecks country-level availability. In Transak 1.0.2, isBuyAllowed andisSellAllowedreflect the same country flag, so selling needs its own asset and payout checks.
⚠️ Match the selected network to your receiving wallet. An EVM address alone does not identify a network. A successful catalog check also doesn’t guarantee the provider will offer the selected purchase; request a quote next.
Step 5: Quote a purchase and open checkout
After you check availability, keep the purchase inputs together so you can use them to request a quote and open checkout.
const purchase = {
     cryptoAsset: asset.code,
     fiatCurrency: fiat.code,
     fiatAmount: 10_000n
}


const quote = await transak.quoteBuy({
     ...purchase,
     config: { network: asset.networkCode }
})
console.log('Purchase quote:', quote)


// Run after your user reviews the quote and chooses to continue.
const { buyUrl } = await transak.buy({
     ...purchase,
     recipient: await account.getAddress(),
     config: {
         network: asset.networkCode,
         referrerDomain: process.env.APP_ORIGIN
     }
})
What's happening:
cryptoAssetselects USD₮ using Transak’s exact code.fiatCurrencyselects USD.fiatAmountis $100 in minor units. Passing 100n would mean $1.networkpins the quote and checkout to Ethereum. Without it, the module uses the first catalog entry with that symbol.recipientselects the destination address. If you omit it, the module uses the bound account’s address. Validate any substituted address.referrerDomainsupplies your registered application origin. Transak requires it to create the widget session; quotes don’t need it.quotecontains amounts and fees for your review screen.buyUrlopens checkout; it is not a transaction ID or delivery confirmation.
Format quote.cryptoAmount with the asset’s decimals (six for USD₮), and quote.fiatAmount and quote.fee with the fiat currency’s decimals. quote.metadata preserves Transak’s full quote, including any fee breakdown.
Quote before continuing, but do not describe this quote as a price lock. The call to buy() receives purchase inputs, not an accepted quote ID. Your user must review the final checkout terms.
Open buyUrl through your application's checkout integration. Because each widget URL is single-use and expires after five minutes, create it right before you open it. Let the provider collect payment and verification information.
But what if your user wants ETH?
Native assets use the same flow. Select ETH from the catalog you already fetched and keep the network explicit:
const ethAsset = assets.find(item =>
    item.code === 'ETH' &&
    item.networkCode === 'ethereum'
)


if (!ethAsset?.metadata.isAllowed) {
     throw new Error('ETH purchase is unavailable')
}


const ethPurchase = {
     cryptoAsset: ethAsset.code,
     fiatCurrency: fiat.code,
     fiatAmount: 10_000n
}


const ethQuote = await transak.quoteBuy({
     ...ethPurchase,
     config: { network: ethAsset.networkCode }
})
What's happening:
ethAssetselects native ETH on Ethereum, and the check confirms that buying is enabled for it.fiatAmountagain requests $100, so the fiat side is unchanged.ethQuote.cryptoAmountis in wei. Format it withethAsset.decimals (18), not USD₮'s six.
Step 6: Quote a sale and follow the payout flow
For cashing out, check that the selected asset accepts sales (asset.metadata.isPayInAllowed) and that the fiat currency supports payouts (fiat.metadata.isPayOutAllowed). Country availability alone is not enough.
The following sells 50 USD₮. Your application supplies the amount as a positive integer in the selected asset's base units:
if (!asset.metadata.isPayInAllowed || !fiat.metadata.isPayOutAllowed ||
    !country.isSellAllowed) {
     throw new Error('Selected sale is unavailable')
}


const sale = {
     cryptoAsset: asset.code,
     fiatCurrency: fiat.code,
     cryptoAmount: 50_000_000n
}


const saleQuote = await transak.quoteSell({
     ...sale,
     config: { network: asset.networkCode }
})
console.log('Sale quote:', saleQuote)


// Run after your user reviews the quote and chooses to continue.
const { sellUrl } = await transak.sell({
     ...sale,
     config: {
         network: asset.networkCode,
         referrerDomain: process.env.APP_ORIGIN
     }
})
What's happening:
- The first check confirms that the asset accepts sales, the currency supports payouts, and the country allows selling.
cryptoAssetselects USD₮, the asset being sold.fiatCurrencyselects the requested payout currency.cryptoAmountis 50 USD₮ in six-decimal base units. To sell 0.05 ETH instead, pass 50_000_000_000_000_000n; ETH uses eighteen decimals. Do not reuse a six-decimal token amount for an eighteen-decimal asset.networkandreferrerDomainwork as they did in the purchase flow.sellUrlopens the selling flow. This call does not transfer your tokens.
Follow the provider's order-specific deposit instructions. Before any wallet transfer, review its destination address, network, amount, and any required memo. Confirm the transfer separately from the eventual fiat payout.
Transak 1.0.2 does not accept a refundAddress. If a sale is refunded, Transak sends the crypto back to the source wallet address, or to an address the user enters in the widget. Unlike buy(), sell() also does not add the bound account's address to the widget parameters.
Step 7: Track the order after checkout
Neither buy() nor sell() returns the provider order ID. Capture it through your checkout integration or provider notifications, then persist it with the direction and your application’s user reference. To correlate orders with your own records, you can also pass config.partnerOrderId to buy() or sell(); Transak returns it in webhooks and order data.
Validate Transak notifications using its documented mechanism and retrieve the order through your backend. Browser redirects and events should trigger verification, not mark an order complete on their own.
Once you have a verified, saved order ID:
const detail = await transak.getTransactionDetail(savedOrder.id)

console.log(detail.status, detail.metadata.status)
What's happening:
savedOrder.idis Transak’s order identifier, not a blockchain hash.getTransactionDetail()calls yourgetOrdercallback, which fetches the order on your backend.statussupplies the normalized state;metadata.statuspreserves Transak’s raw status.metadata.transactionHashholds the on-chain hash once Transak provides it.
Normalized state | Your application’s action |
in_progress | Continue tracking; show the provider’s current processing stage. |
completed | Report the provider’s completed outcome for that direction. |
failed | Inspect the raw status and explain the outcome. |
Keep the raw status. Transak maps REFUNDED, CANCELLED, and EXPIRED to failed. They require different explanations.
The module also maps unknown statuses to in_progress. Use bounded polling and retain unresolved orders for backend reconciliation. Closing checkout or reaching a polling deadline does not establish failure.
Dispose of wdk when your wallet lifecycle ends. Keep order tracking independent of private-key retention.
Common Errors
- Wrong environment: Match your credentials, the module's environment, and your backend configuration. Staging keys only work with staging hosts.
- Wrong amount: Convert fiat minor units and crypto base units separately. USD₮ uses six decimals; ETH uses eighteen.
- Checkout rejected: Check referrerDomain, the user IP sent with the session request, and session expiry. Widget URLs are single-use.
- Unsupported purchase or sale: Refresh availability, check the asset, currency and country flags, then inspect the provider response.
- Missing order: Capture and persist the Transak order ID. A checkout URL cannot replace it.
- Tracking never settles: Inspect the raw status and resume reconciliation. Do not start a new checkout because tracking stopped.
Key Insights
- Discover before offering: Availability depends on more than an asset symbol.
- Keep secrets server-side: Session creation and order lookup belong on your backend.
- Quote before checkout: A quote is not a price lock. Users still review the final payment terms.
- Separate milestones: Checkout, payment, delivery, and payout are different states.
- Reuse the workflow: Switching between USD₮ and ETH changes identifiers and decimals, not methods.
- Preserve order identity: Track the existing order before starting another.
What's Next
You now have the funding and cash-out steps for your wallet’s swap and lending flows.
Follow WDK’s official X account for announcements. Join Discord to ask questions, share what you’re building, and get help from the team.
Resources: WDK documentation, Transak module.
Receive the latest WDK news
Click to subscribe to the WDK newsletter and stay updated!
Latest Articles & Guides

Swap and Bridge in WDK: A Guide to Five Routers
Compare five WDK routers, find routes, get a quote, track a cross-chain transfer, and understand what changes when you switch providers.
Swap and Bridge in WDK: A Guide to Five Routers
Compare five WDK routers, find routes, get a quote, track a cross-chain transfer, and understand what changes when you switch providers.
